Getting Started
Step 1: Download our latest ev3dev-robolab image file
We are using customized images based on ev3dev. Grab our latest release from here.
You cannot use the original ev3dev images to solve all tasks in the RoboLabs, because some packages are missing.
Step 2: Flash the SD card
Next the image has to be flashed onto the SD card you received with your LEGO EV3 box. There is a neat tool called Etcher that comes with cross-platform support and won’t give you any headaches.
- Download and install Etcher.
- Launch Etcher after it was installed.
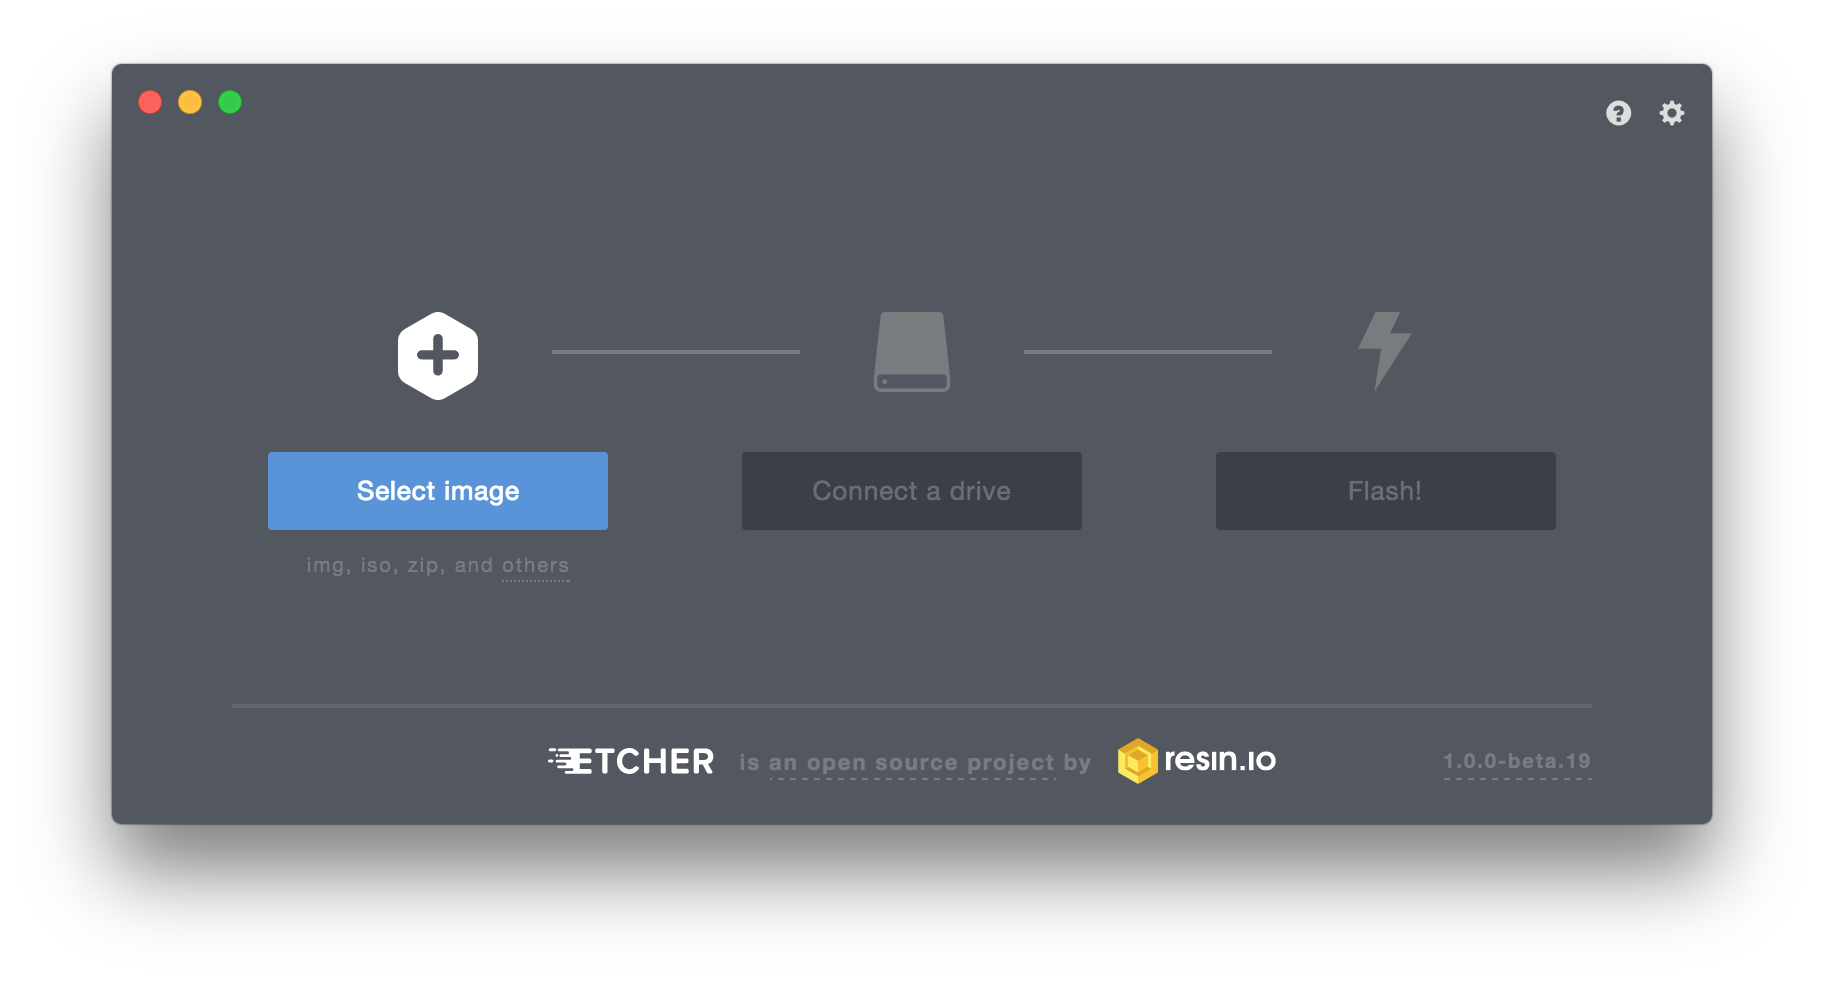
- Select the previously downloaded image file. There’s no need to extract the compressed image.
Etcher will work fine with any.ziporimgarchive.
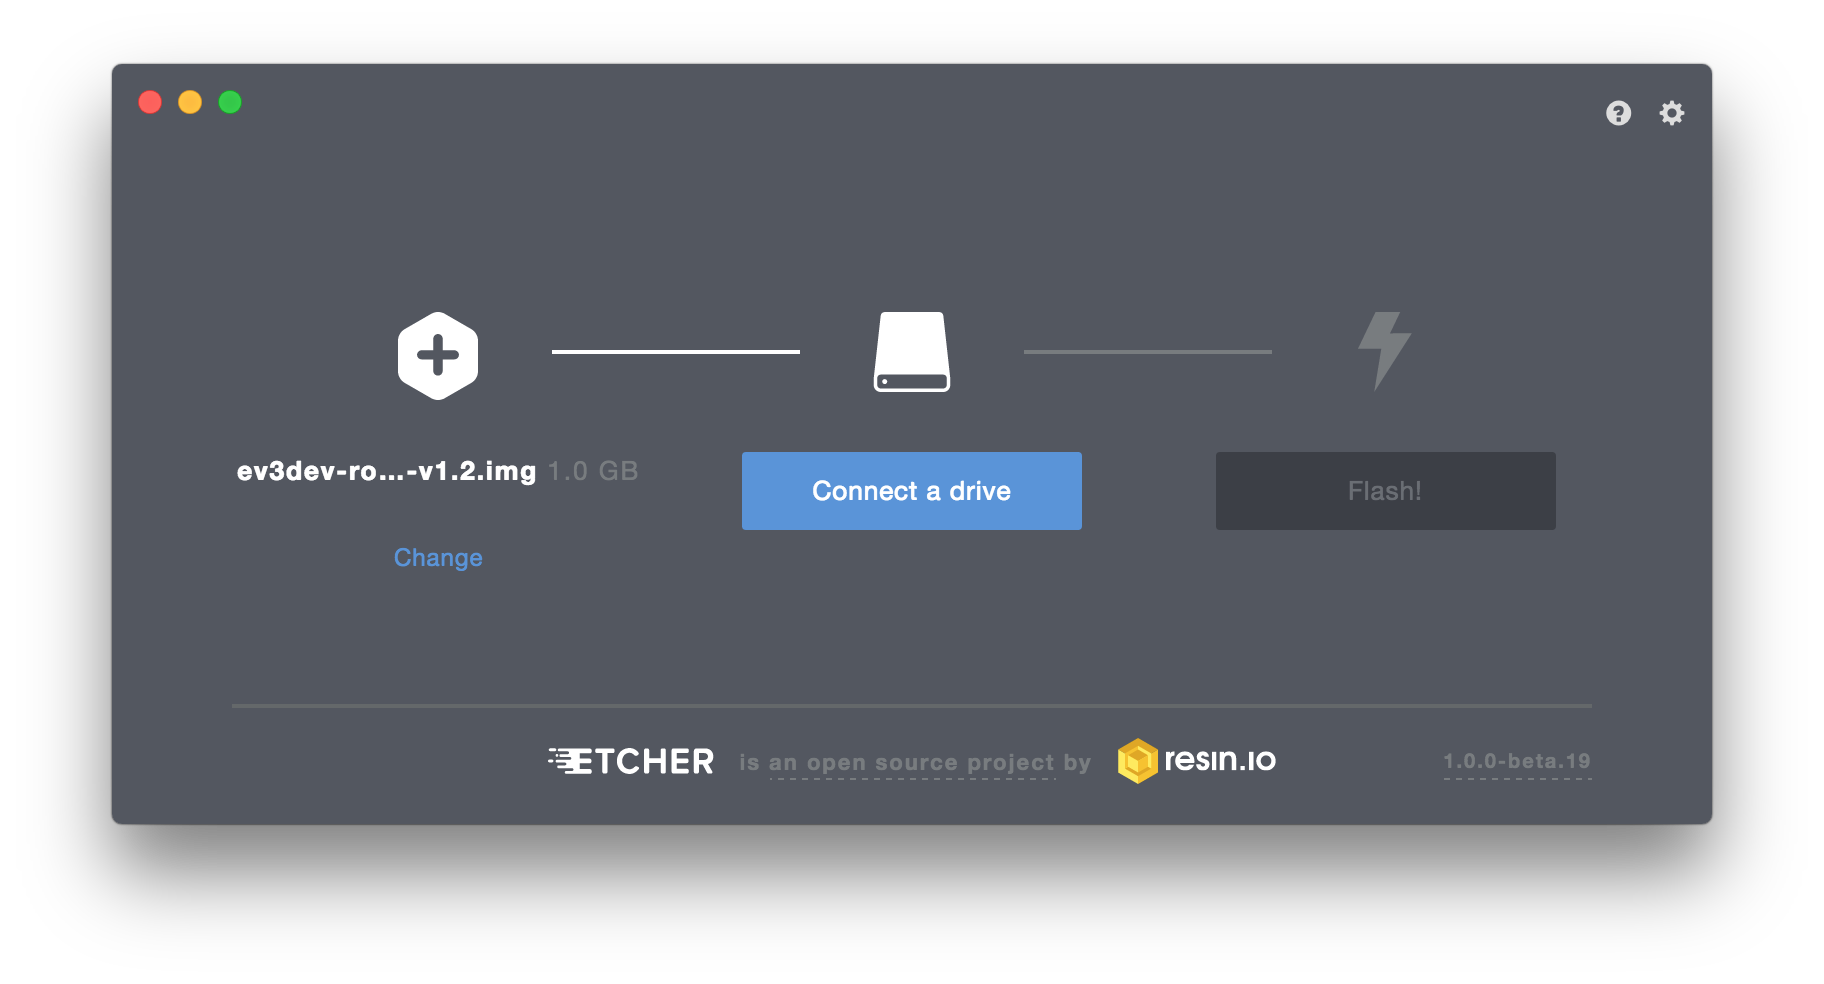
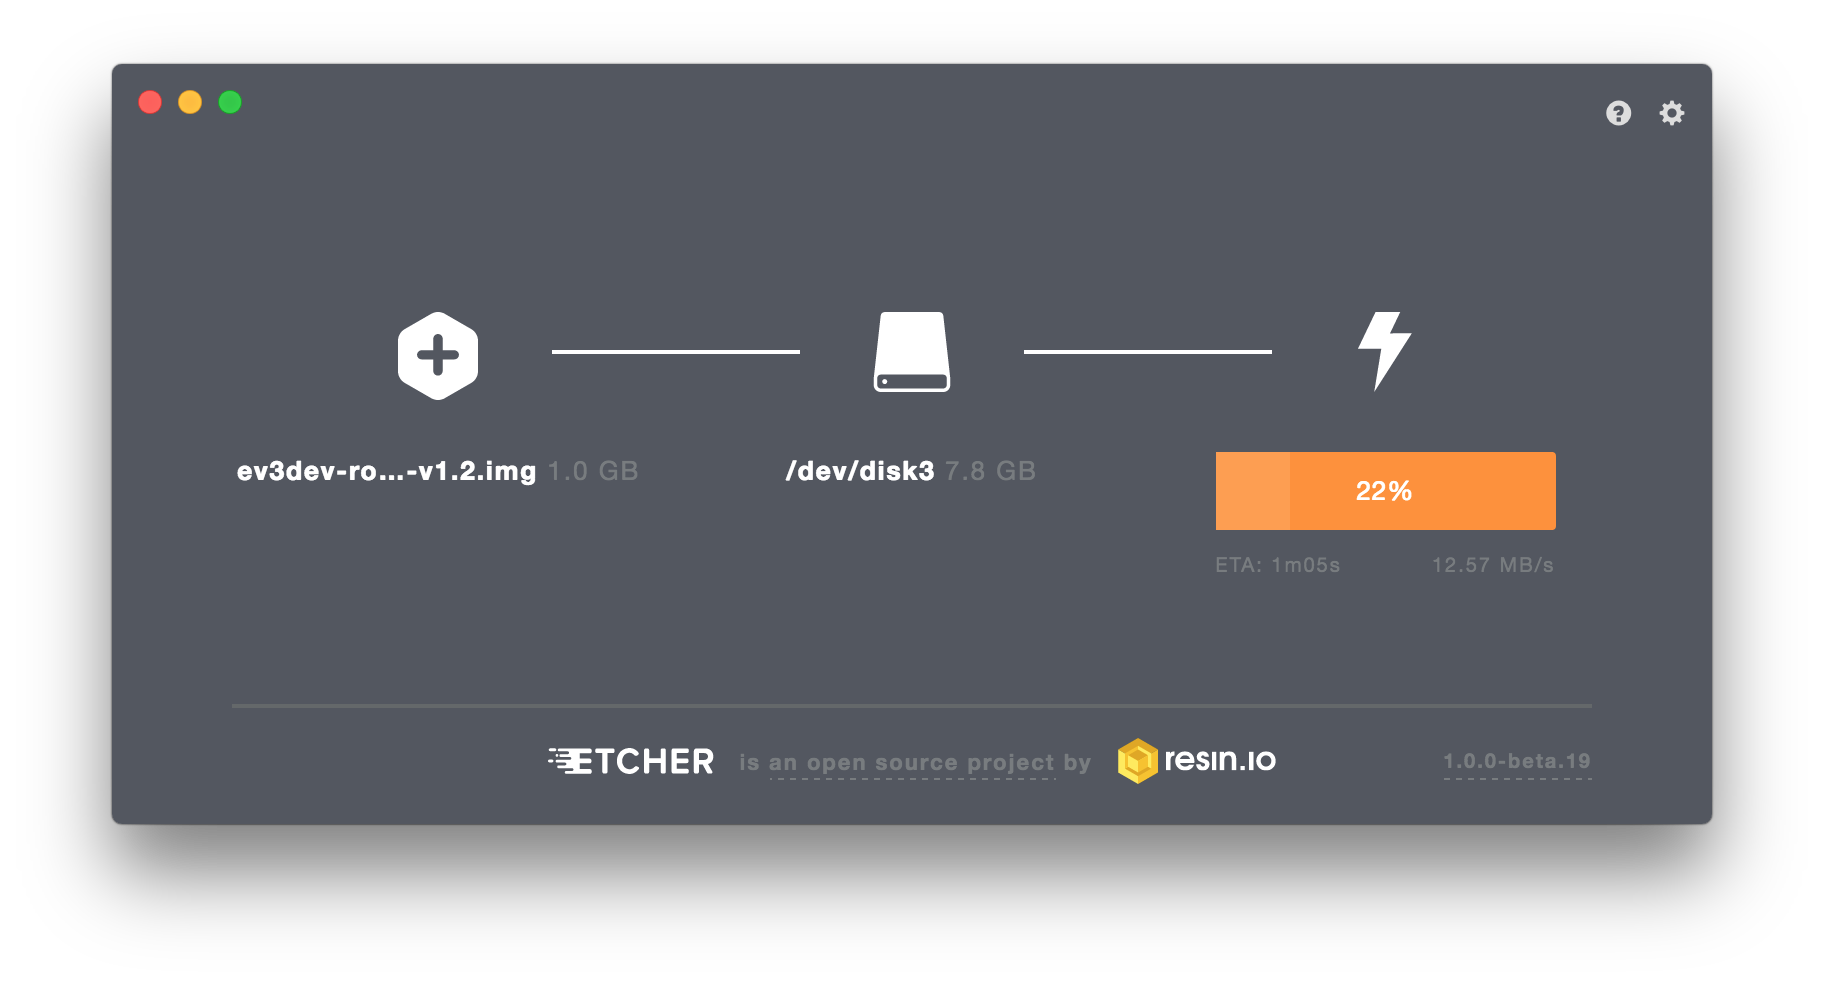
- Use the packaged microSD to SD adapter or any personal accessory to plug the SD card into your computer. Etcher will detect the new device and display the drive information. If multiple removable devices, for instance USB drives, are connected you have to select the SD card from the list, by hitting “Change” below the currently selected drive.
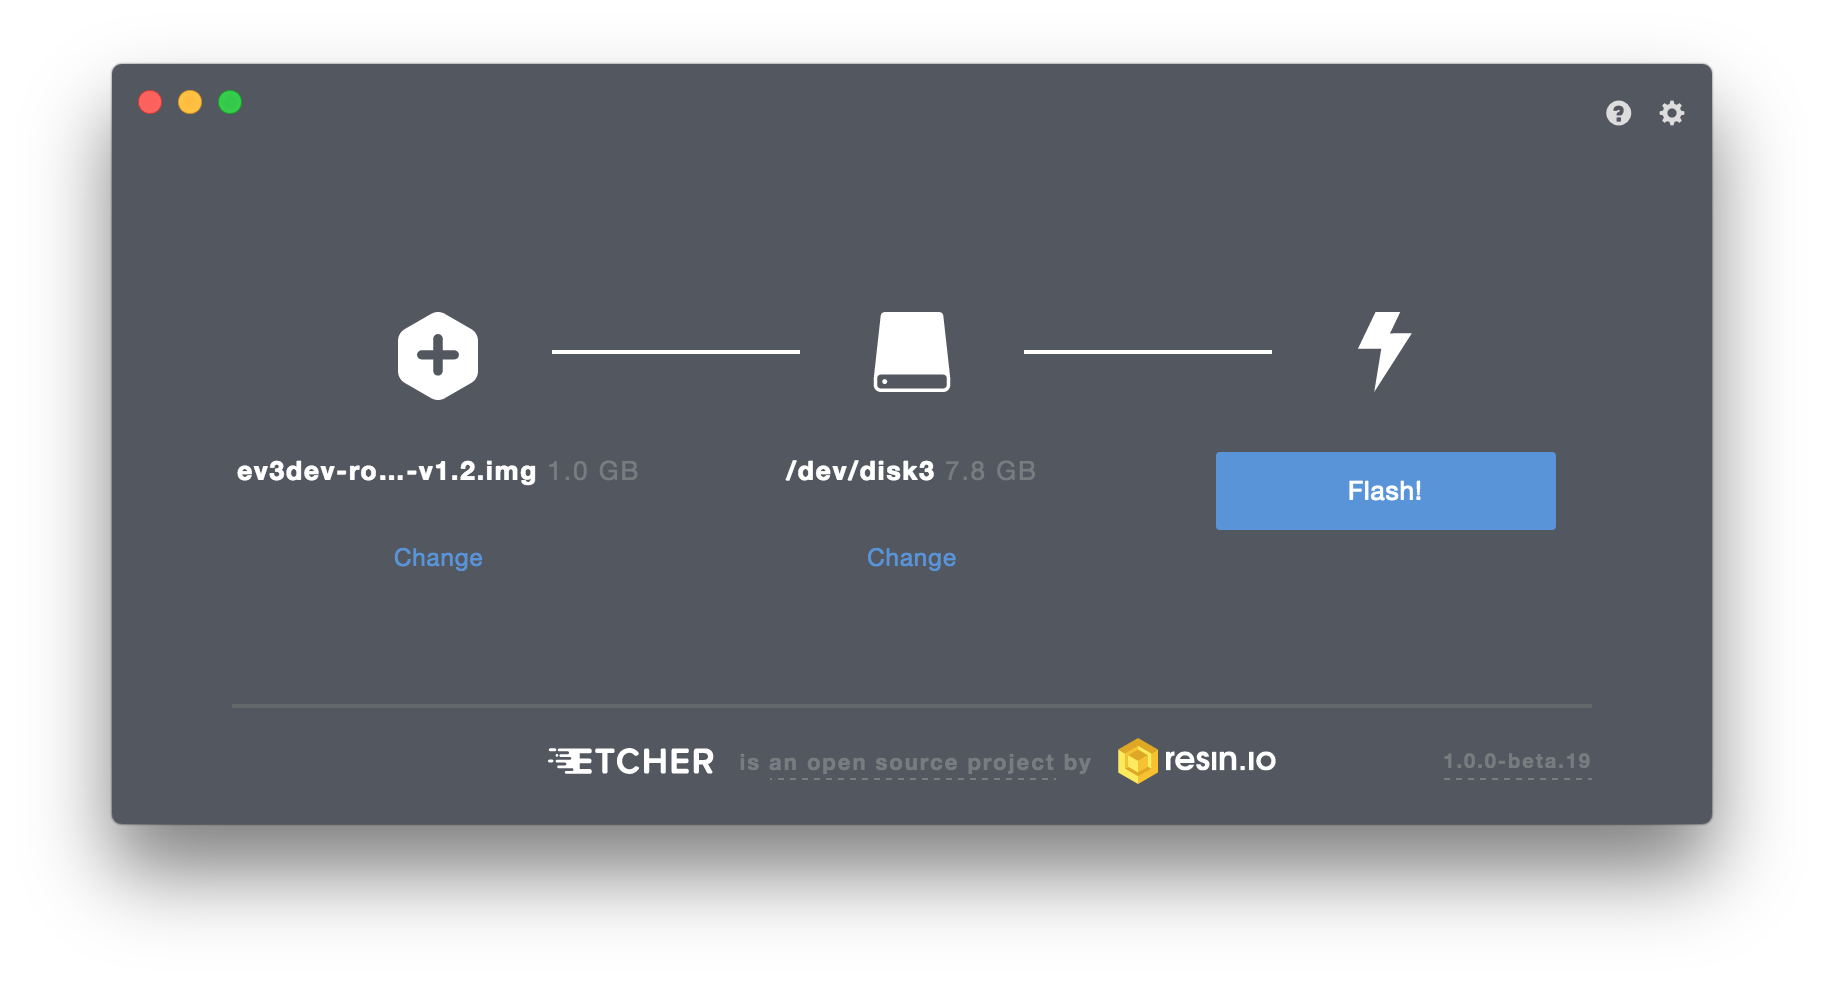
- Now start the process of copying the image by a click on the “Flash!” button.
On Linux systems it is possible that you will be asked for the root password.
Please make sure that you have selected the correct drive for flashing the image, as all pre-existent data will be lost.
If you’re uncertain, simply temporarily disconnect all periphery (USB flash drives, etc.) except the SD card from your computer and then start Etcher.
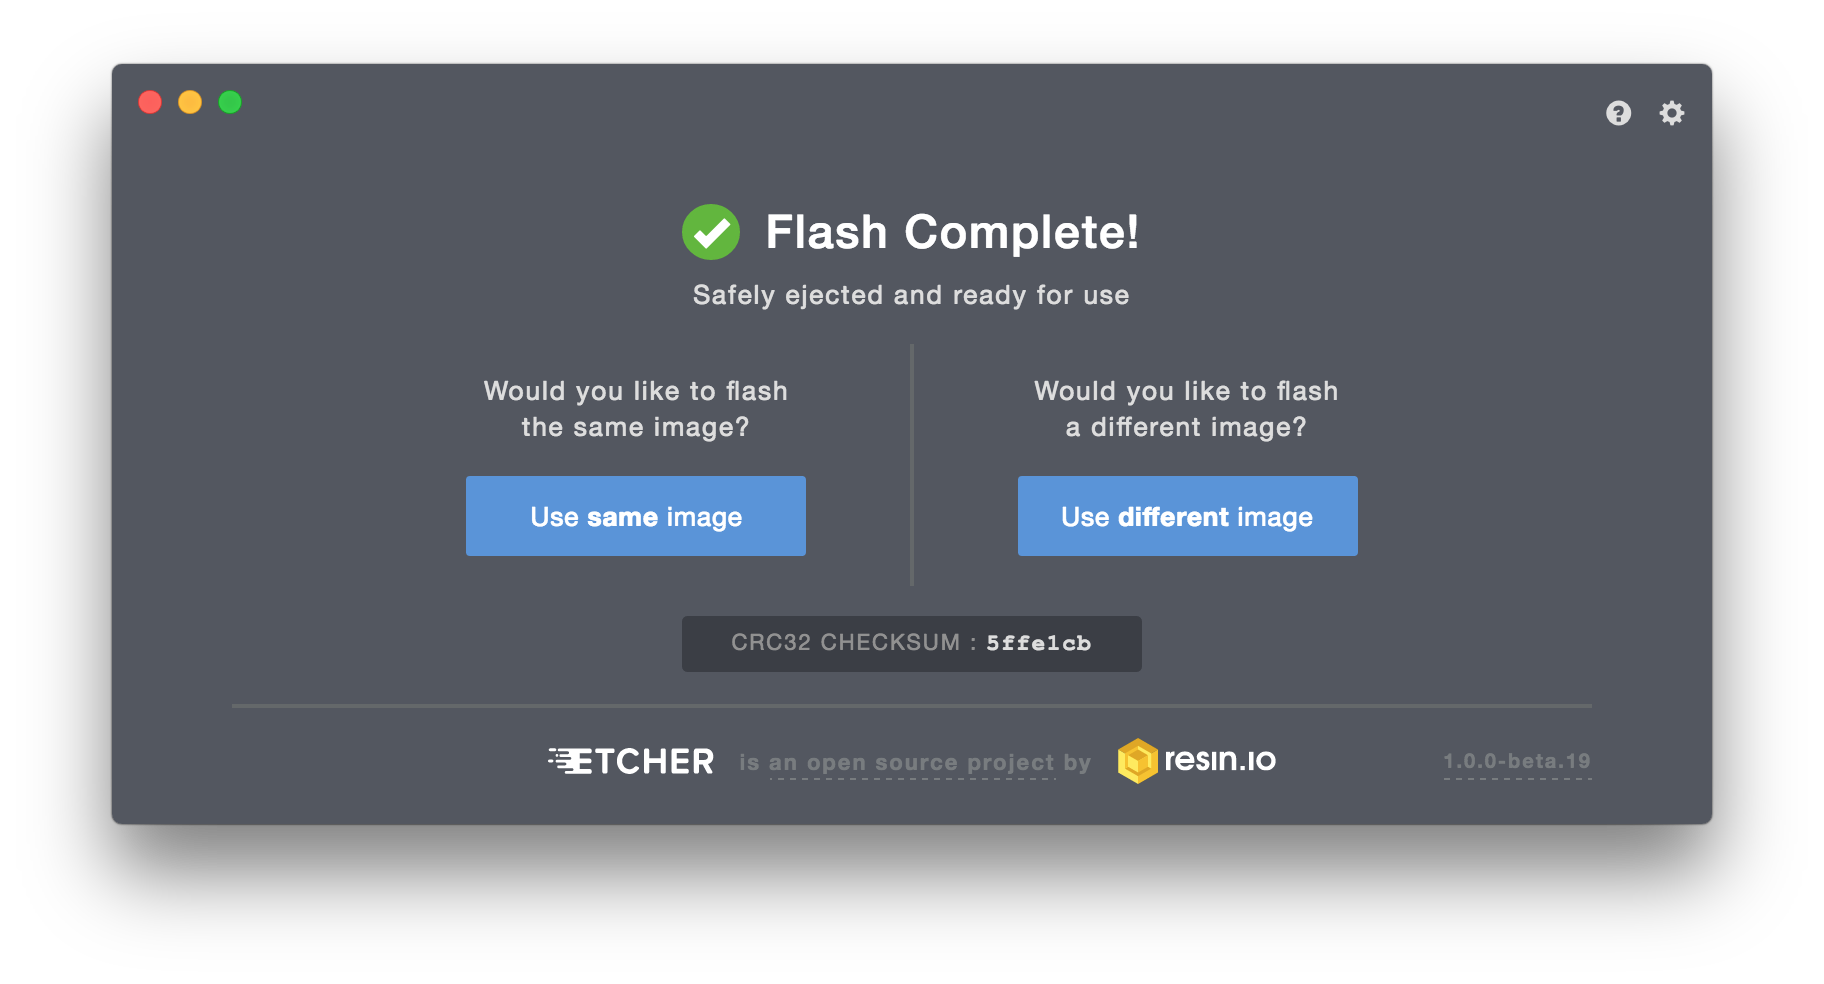
- After flashing the SD card, Etcher will automatically run a fast check that validates the integrity. It also ensures that the drive is bootable. You may abort this process by simply plugging out the card. However, we recommend spending the few extra seconds.

- Finally, Etcher will show a notice that the flash has been successfully completed. You’re safe to unplug the SD card and plug it into the brick.
For more detailed instructions and other ways of writing our image to the SD card, check out the tutorials from the ev3dev folks.
Step 3: Boot the brick
After you successfully flashed the image onto the SD card and inserted it into the slot, boot the brick by pressing the square button in the center of its control keys. At first, you will see the Mindstorms boot splash and the red LEDs will be lit. Shortly thereafter follows the boot splash and the LEDs are changing their color to orange. Blinking indicates disk activity on the SD card.
During the first boot, the screen may go blank and the whole startup process can take significantly longer.
This is because the EV3 has to take care of some initial housekeeping activities.
After a minute or two, you will see the Brickman logo and a text saying “Brickman loading…”.
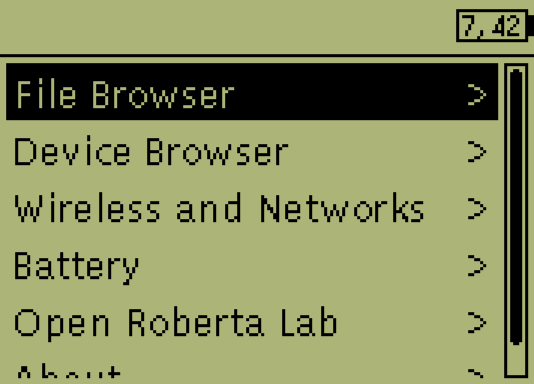
Brickman is the main user interface providing the ability to configure wireless and network settings, check the battery and connectivity status as well as lots of other things.
Finally, the LEDs turn green, and you will be greeted with the main menu of Brickman:
If this is not the case, and you instead hear some sounds from the robot, somehow the standard LEGO MINDSTORMS E3 firmware has been loaded. Please check the correct placement of the SD card, validate the integrity of the drive as well as the image or ask your tutor for help.
Step 4: Navigating
Right below the display in the bricks center are the main controls for navigating through menus.
The center button that turned on the EV3 also serves as the “Enter” key and therefore lets you enter deeper menu levels.
You can leave a menu by pressing the separate button in the upper left corner of the main controls.
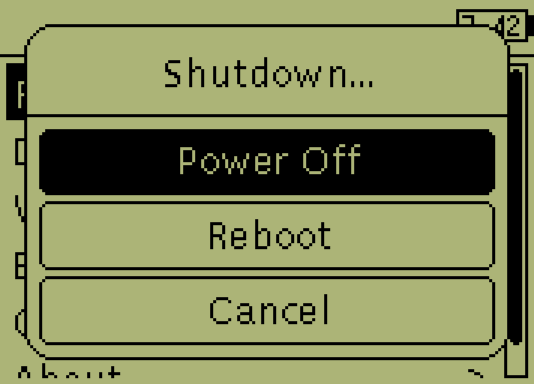
When pressed in the main screen, it also prompts a dialog for shutdown or reboot of the brick.